meta data for this page

N4V Panel - Settings
The Designer Extension
The Designer extension give the Webi designer the access to the Settings Panel. The Settings Panel will only be available on a SAPBI 4.3 SP4+ environment.
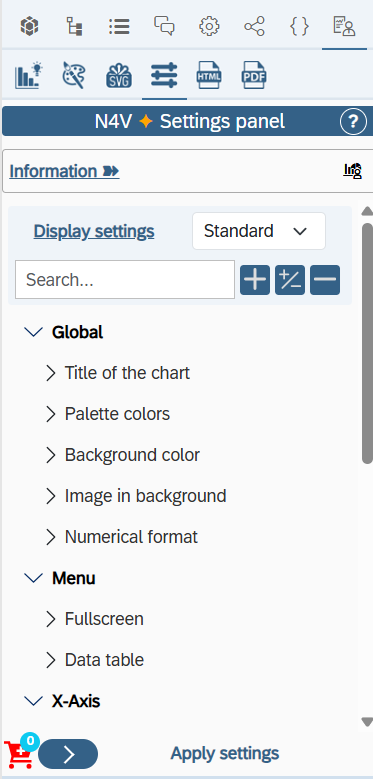
Displaying the N4V Settings Panel
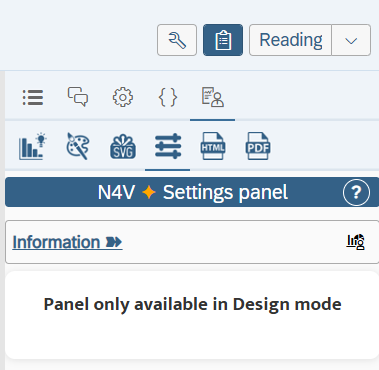
The Settings Panel should not appears in Reading mode. Depending on the Webi version, it may appears. In this case, a simple message is displayed, indicating that this panel can only work in Design mode :
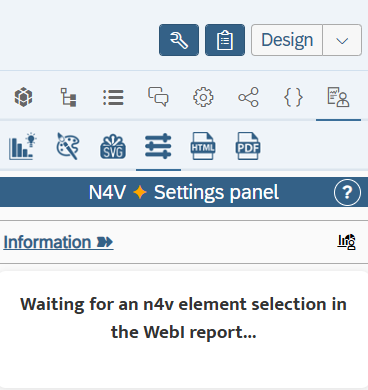
When you are in Design mode, the panel is just waiting a selection of a N4V widget :
When the Widget is selected, the settings for this widget are displayed in the panel :
Be more productive with the N4V Settings Panel
Due to the huge number of setting available for all our widgets, we have decided to help users to better use them.
We have organized the settings in 3 different modes/views :
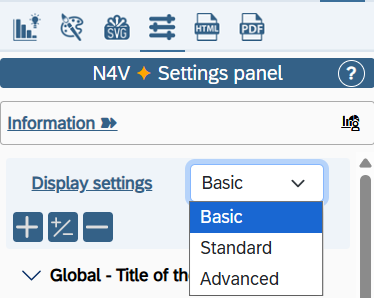
- Basic view
This is a quick access to the most fundamental settings for the widget. You can generally set a title, the colors, the background, the numerical format… This view will be prefered for the beginners on N4V charts.
- Standard view
As soon as a user has drown his first N4V charts, he will require more settings to get more benefit of the widget. So he can now display the standard view of the settings. In this mode, you'll can set deeply your widget, using a lot of powerfull settings.
- Advanced view
Drawing a N4V widget has no secret for you ? So you can now display the Advanced mode. This mode is the equivalent of the classical “Webi Extended Parameter” panel. You'll find in this mode all the settings available for the widget. Through this view, you will be able to tune-in your widget exactly as you need/want !
A panel to help you
We've added features to the panel to help you and make it more accessible and easier to use.
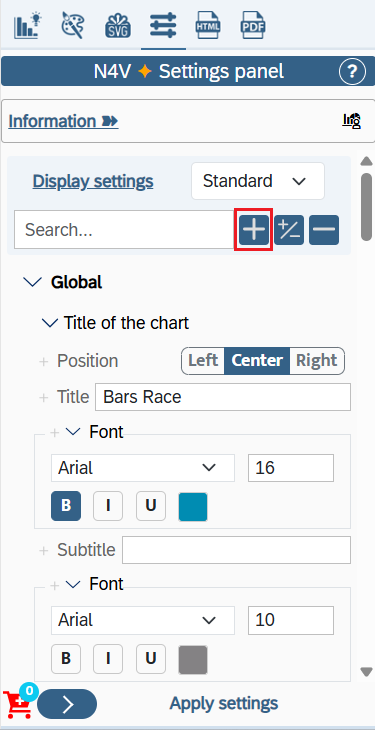
In Standard and Advanced views, you'll find a Search bar to find easily the setting you need.
We also have added a powerfull fold/unfold system to get a better view of all settings (by categories & groups) displayed in the panel.
- Click on the “+” button will unfold all the categories and groups :
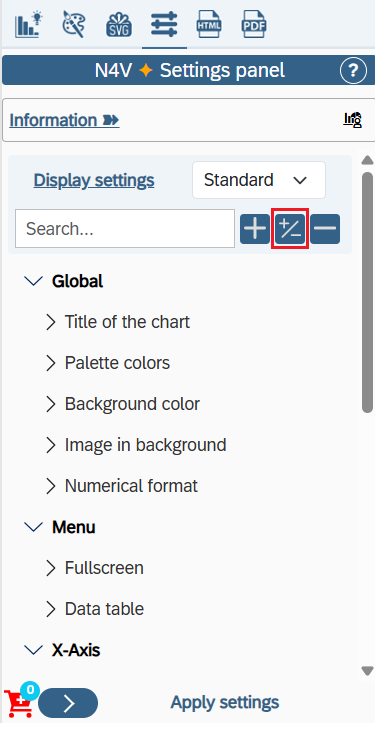
- Click on the “+/-” button will unfold all the categories and fold all groups :
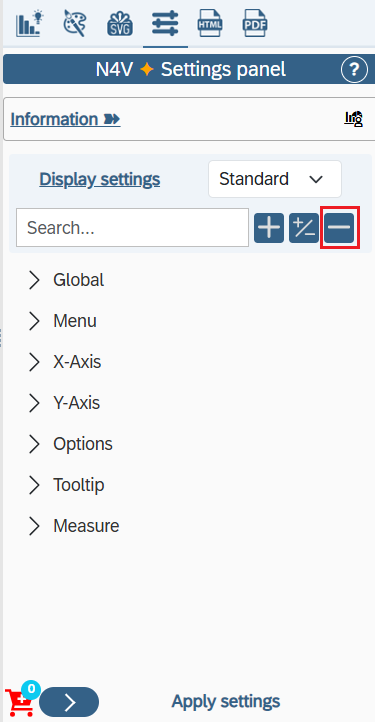
- Click on the “-” button will fold all the categories and groups :
Switching easily in "Reading" like mode
When you are disgning a N4V Widget, sometimes you want to view the widget in “Reading” mode to activate the Custom Element Interaction.
In the N4V Panel, we have added a button to enable/disable easily the interaction in the report.
You can continue to update the settings of the previously selected N4V widget while the interactions are activated.
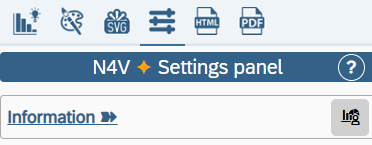
Designing a N4V Widget has never been so easy !!
The Usage of the Settings Panel
All current values of the settings for the widget (previously set through the standard “Extended parameter” Webi panel, are correctly displayed in the N4V Panel :

Feeding the settings through the N4V Panel or through the classic “Webi Extended Parameters Panel” result in the same way.
As soon as a setting is updated, a small red cart will be displayed in front of the setting, and the counter of modified settings will be updated on the red cart near the “Apply settings” button (at the bottom of the panel) :
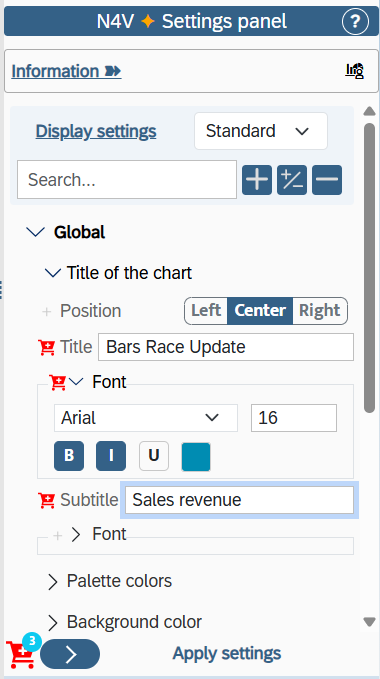
To validate the update of the tagged settings, just click on the “Apply settings” at the bottom of the panel.
The N4V widget is automatically updated.
If you display the classical “Webi Extended Parameters” panel, you'll retrieve all the update you've done through the N4V Panel.
Apply settings on multiple widgets
With the N4V Panel, you can set the same settings to a multiple selection of N4V widget in the same time.
Select multiple N4V widget on your report (with Ctrl+click selection).
The settings of the first clicked widget are displayed in the N4V Panel.
Update the settings you want to be commonly set to your selection.
Click on “Apply settings”
→ The updated settings are applied to all the selected widgets.
Open the Setting Panel in a dedicated popup window
To get a better experience, you can open the Settings Panel in a full dedicated window (you can display this window on another screen than the one used to display Webi)
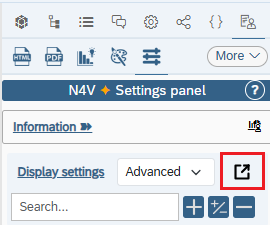
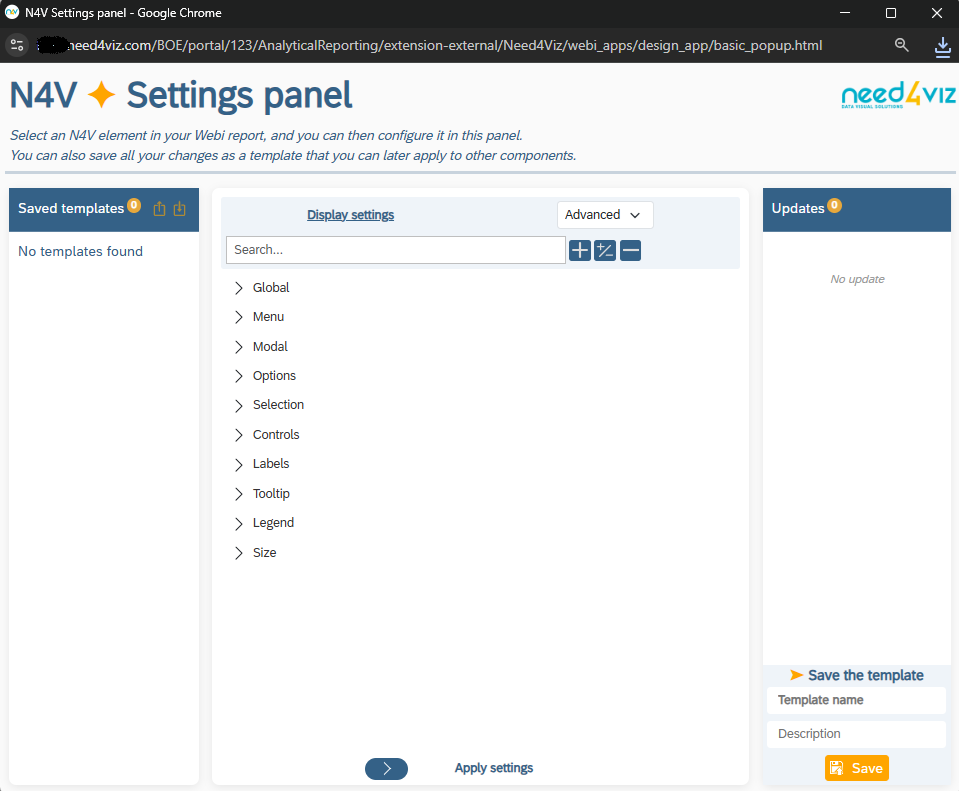
All the updates you make in the Webi panel or in the dedicated popup are automatically replayed on both panels.
You can apply your updates on the N4V widget in the Webi Panel or in the popup panel.
Use the templates in the popup window
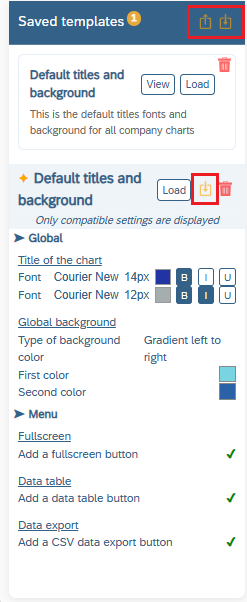
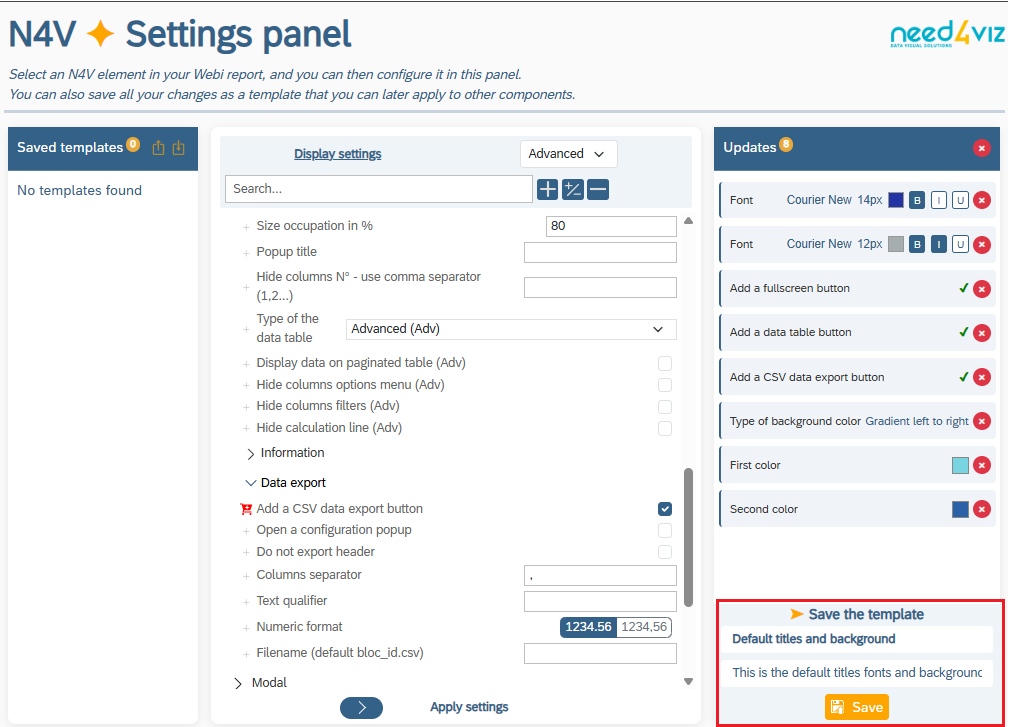
In the popup window, you can select some updates or some settings formats already applied on your N4V widget and save the selection in a “Template”.
Give a name and an optional description of the template.
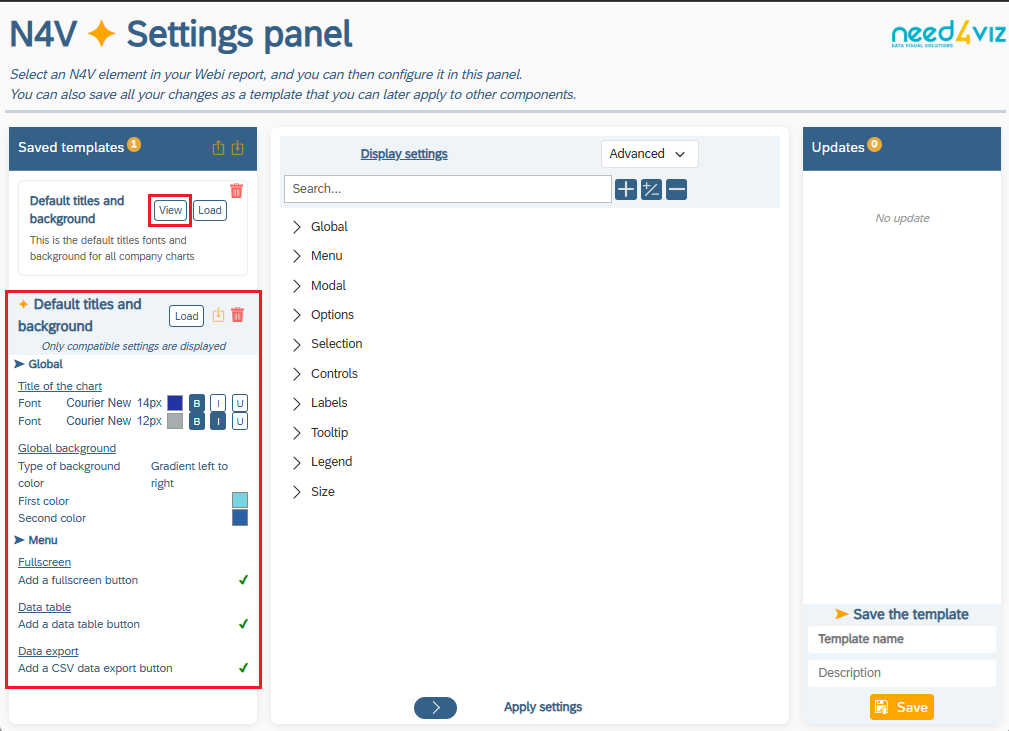
You can easily view the content of a saved template clicking on th “View” button
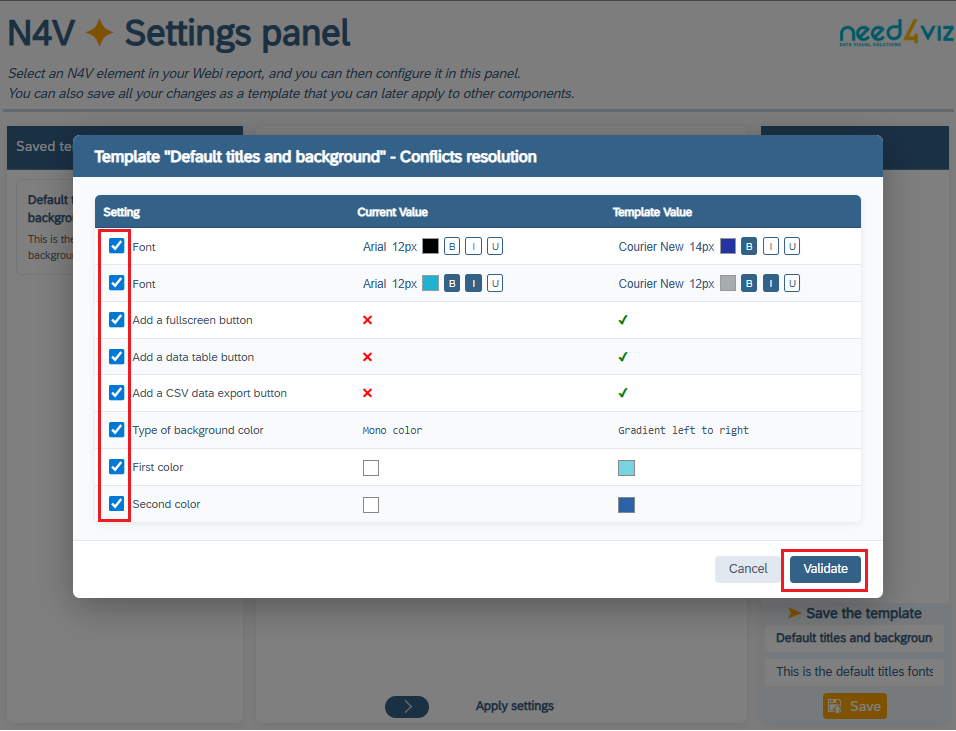
If you decide to apply the template to one (or a selection of multiple) N4V widget, click on the “Load” button.
A popup show you the differences between the current settings and the values of the template that will be applied.
You can select the values you want to apply or not and clic on “Validate” to select them.
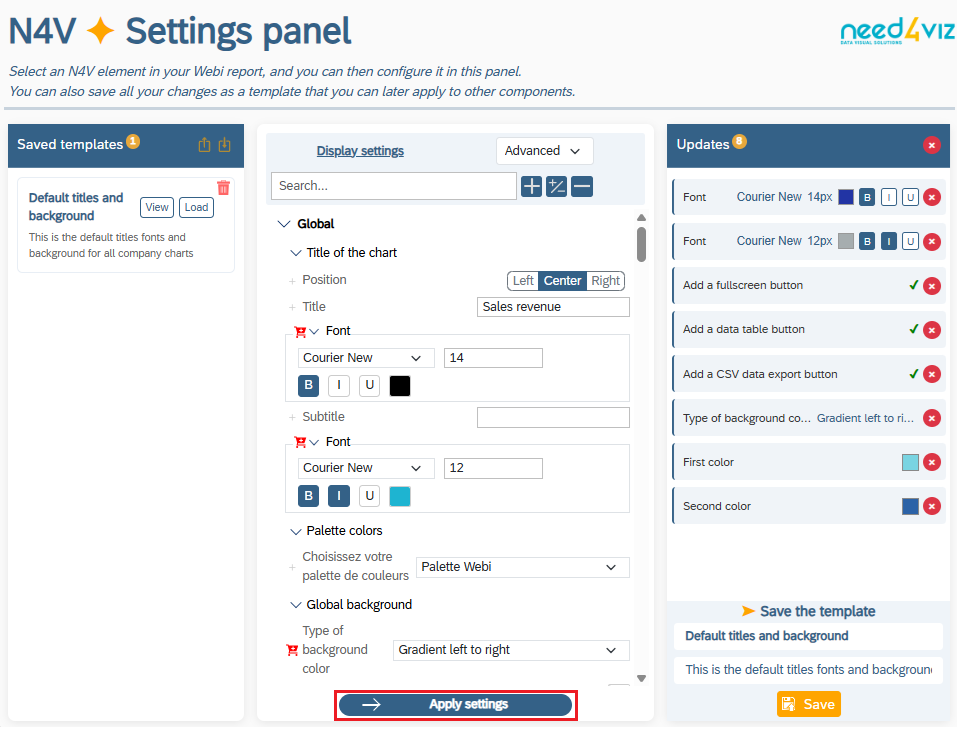
Once it's done, click on the “Apply” button at the bottom of the settings list.
One or all templates can also be exported on your desktop.
The generated file can be imported in another user desktop (or in another SAPBI environment).
This will facilitate template exchange between users and local saving of your templates.